To import an XML, JSON, or AVN (Abstract Value Notation) file and convert it to a binary encoding, select the Import... option from the File menu. A file dialog will be shown. The file import filter in the lower right corner will allow either an XML, JSON, or AVN file to be chosen based on extension:

Navigate to and select an XML, JSON, or AVN file to import and click Open. If an existing project is currently in use, ASN1VE will ask the user if they want to use existing project information. If yes, the import is done and the dialog is complete. If no, or no project is active at the time, ASN1VE will prompt for encoding rules. These determine the binary encoding that the imported file will be converted to. Choose an option and click OK. ASN1VE will then provide a wizard for selecting an ASN.1 schema to use.

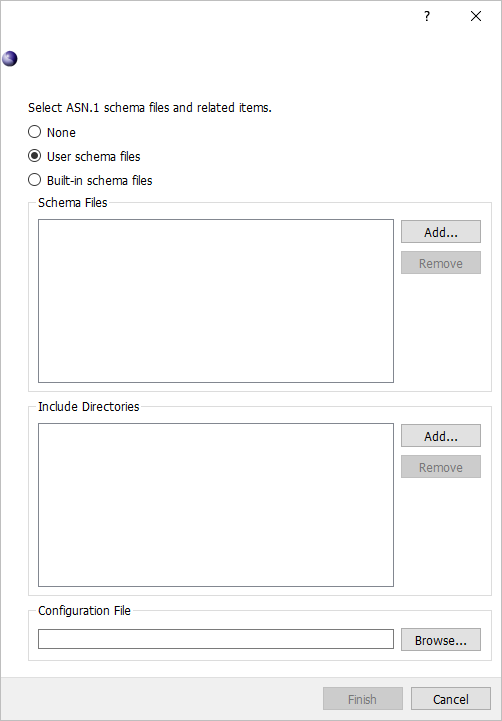
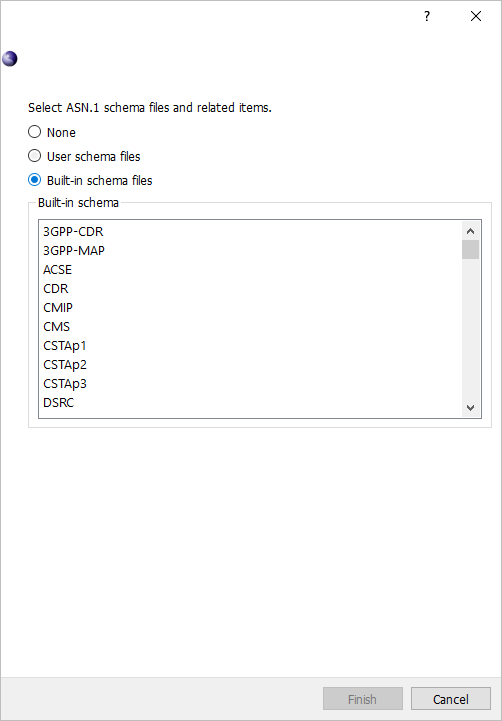
At the top, two options are available, User schema files and Built-in schema files. User schema files allows the user to select their own ASN.1 schema files. Built-in schema files presents a list of available schemas built in to ASN1VE.

If User schema files is selected, the wizard shows lists for schema files and include directories. ASN.1 schema files should be added to the list of schema files that define the type of message being created. Include directories can contain additional schema files that define types used by the schema.
Clicking Add... next to either list will bring up a file dialog. Navigate to the directory or file(s) to add, highlight them, and click Open.
To remove a listed file or directory, highlight it in the list and click the Remove button next to the list.
Below the schema files and include directories, Configuration File allows the user to apply settings from an Objective Systems configuration file. To select a configuration file, click the Browse... button. See the Configuration Files section for more information.
If Built-in schema files is selected at the top, the wizard will show a list of all the available built-in schemas in ASN1VE. Click to select a schema to use.