To open an existing message data file in ASN1VE, select the Open... option from the File menu (or use keyboard shortcut Ctrl-O). This will bring up a dialog box for selecting the file.
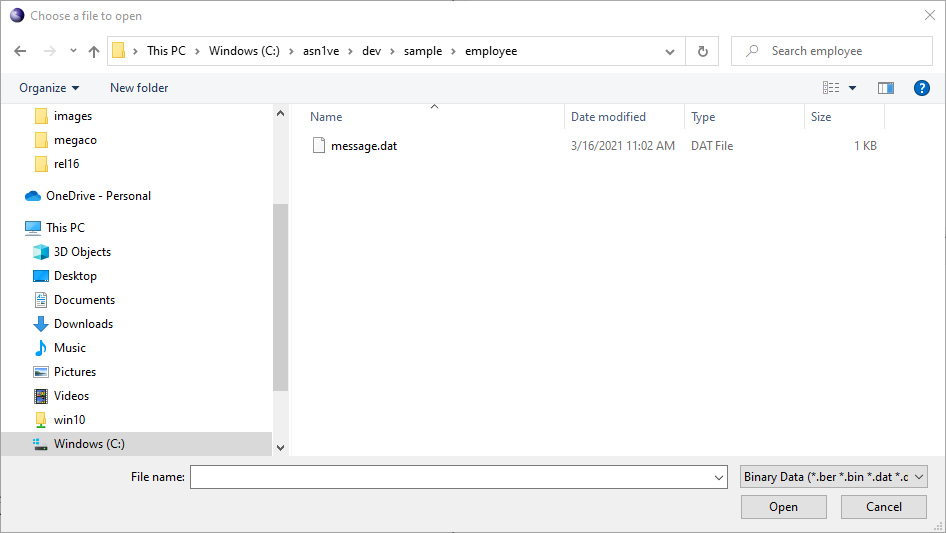
Note the dropdown file-type menu at the bottom right. This can be used to filter files by some standard extensions. By default, this is set to All Files, meaning all files within a given directory will be displayed as candidates to be opened. Changing this to one of the other options will limit the list of files available for selection.
The current file types that can be filtered are as follows:
- Binary Data
-
Binary data files are message files with no headers and which require no transformation of input data to binary format upon loading. These files may have generic extensions '.dat' or '.bin' or can have specific encoding rules extensions '.ber', '.der', '.per', or '.uper'. If a file with a specific encoding rule type is selected, the step in the wizard that selects encoding rules is skipped.
- Call Detail Records
-
Call Detail Records are defined to be ASN.1 BER-encoded data files with internal non-ASN.1 headers or block formats.
- Certificates
-
Certificates are binary DER-encoded data files conforming to the X.509 or PKIX standards. Selecting a file using this filter will cause the file to be loaded and the PKIX built-in schema to be automatically assigned. Note that this should not be confused with PEM files (specified below) as these are also commonly used for Certificates but have a different input format (base-64 with a special header and trailer).
- Hexadecimal Text
-
Hexadecimal Text are files containing a textual representation of binary data in hexadecimal form. Message dump files are commonly in this format.
- Base64 Text
-
Like hexadecimal text, this filter describes a textual format that is transformed into binary data when teh message is loaded. This format is common used for security-related files, although these files may also be in the PEM format described below.
- Privacy Enhanced Email (PEM)
-
This format is commonly used to represent certificates and other security-related formats. It attempts to create self-contained messages that identify the ASN.1 type in a header line prior to the start of the content. For example, a PEM file that describes an X.509 or PKIX certificate would begin with the line '-----BEGIN CERTIFICATE-----' and end with '-----END CERTIFICATE-----'. Other types may be specified as well. ASN1VE currently supports automatic loading of Certificate and Certification Request (PKCS10) PEM files. Others require the ASN.1 schema be explicitly assigned.
The remainder of this section will assume the user opened the file using the 'All Files' filter and therefore all additional information needs to be specified using the ensuing wizard. Using a filter option will cause some or all of the following items to be skipped.
If existing project information is in place when the message file is opened, the user will be asked if they would like to use the existing project. Clicking 'Yes' will cause existing information to be used and the dialog is terminated. Clicking 'No' will launch the file information wizard.
The first screen in the wizard is the 'Select file type' window:
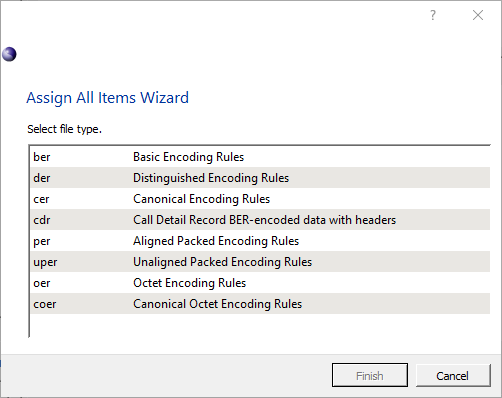
The file types are for the most part the encoding rules with the one exception being the 'cdr' option. If this option is selected, the user is prompted to enter header and other file format related information in the next window:
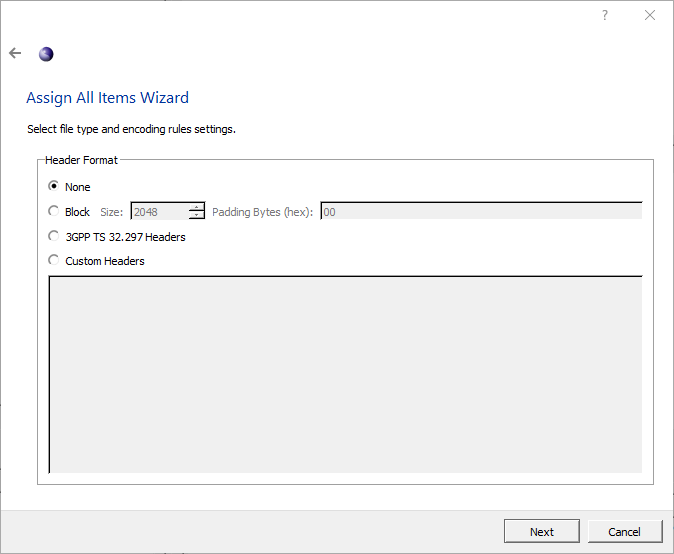
The various options are as follows:
- None
-
No headers will be added to the encoded data. This is the same as having selected "ber" in the file type window.
- Block
-
Data will be encoded into blocks of a certain size. If a message would normally be encoded across a block boundary (for a block size of 2048 bytes, this boundary is at offsets 2048, 4096, 8192, ...), the rest of the current block is instead padded out and the message is encoded, starting at the beginning of the next block. Padding bytes are also used to determine whether a block contains more data or is padded out.
- 3GPP TS 32.297 Headers
-
Data will be encoded according to the TS 32.297 standard. This includes file and message headers of the standard format.
- Custom Headers
-
Custom headers are fixed-length headers that allow data fields within the headers to be specified. Selecting this option will cause an additional dialog to be opened that allows headers and header fields to be declared:
See the section on editing custom headers for details on editing the header format.
After header options are specified for CDR's and for all other message types, the window to enter ASN.1 schema information is presented:
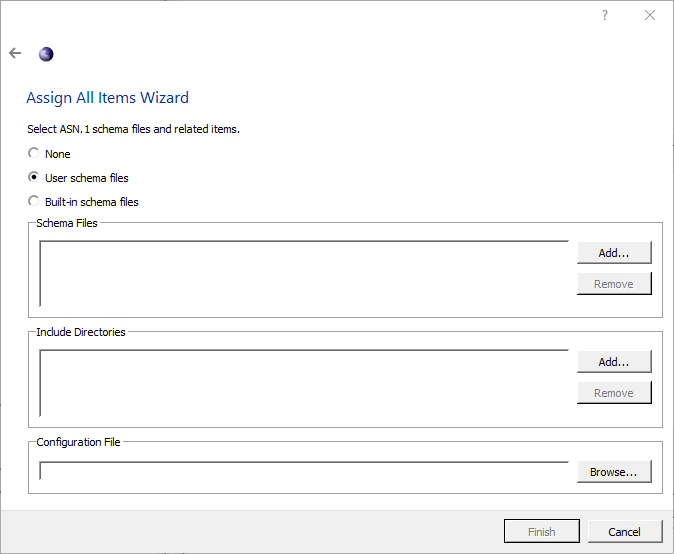
At the top, three options are available, None, User schema files, and Built-in schema files. The None option is only available for BER and allows a user to open a message without schema. The User schema files option allows the user to select their own ASN.1 schema files. Built-in schema files presents a list of available schemas built into ASN1VE.
Below the selection options, the wizard shows lists for schema files and include directories. ASN.1 schema files should be added to the list of schema files that define the type of message being created. Include directories are directories to search to resolve import statements within the selected schema files.
Clicking Add... next to either list will bring up a file dialog. Navigate to the directory or file(s) to add, highlight them, and click Open.
To remove a listed file or directory, highlight it in the list and click the Remove button next to the list.
Below the schema files and include directories, Configuration File allows the user to apply settings from an Objective Systems configuration file. To select a configuration file, click the Browse... button.
If Built-in schema files is selected at the top, the wizard will show a list of all the available built-in schemas in ASN1VE as shown in the following image.
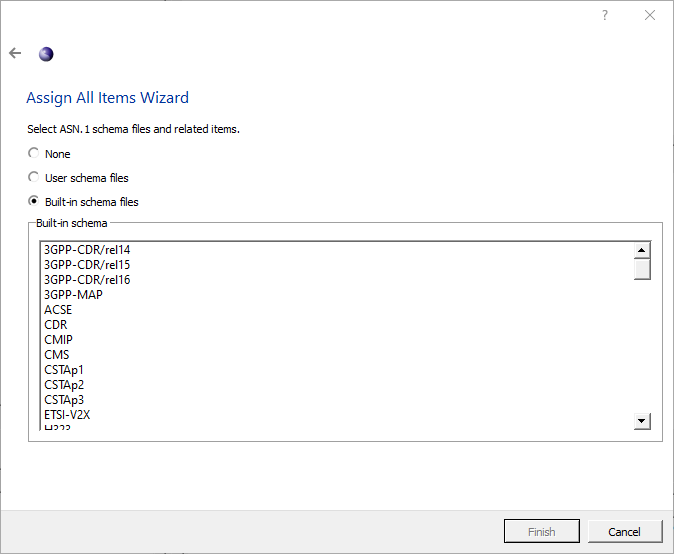
Click on a schema entry to select a schema to use.
Once a schema has been selected, click Next. The wizard will show a list of types that can be used as the protocol data unit (PDU) for the message.
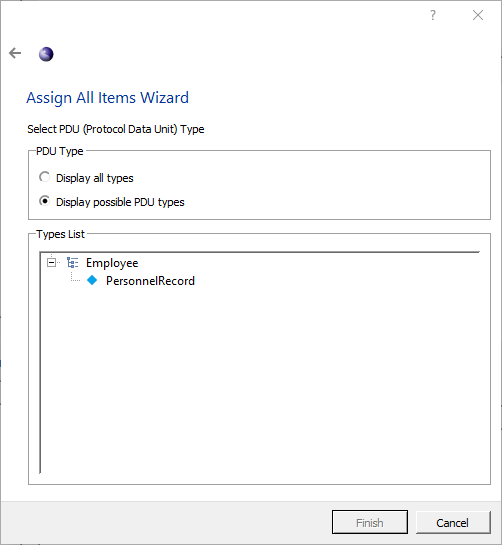
Click a node to select a PDU type. If the type desired is not shown, clicking Display all types at the top of the window will display a list of all the types defined in the selected schema. Once a PDU type is selected, click Finish.
If opening the file is successful, the Tree View will show the top-level data unit in the file, and the Hex tab will contain the encoded file data.