In the New Message Dialog and in the Project View Window, the option exists to create or modify custom headers. Invoking this option brings up a dialog similar to the following:
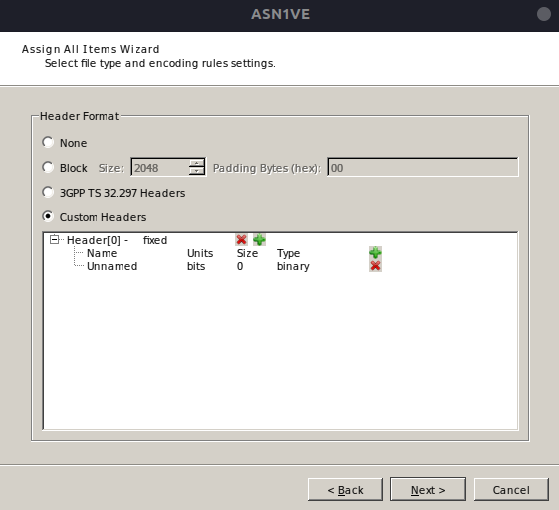
When creating a new message, the dialog expands to allow the initial header to be created. The cursor can be placed within the header field definition area and then the field items edited. The following items can be specified for a header field:
- Name
-
Name of the header.
- Units
-
Units of the field (bits or bytes).
- Size
-
Size field of the field in Units.
- Type
-
Type of the field. The types currently supported are binary, integer (big-endian), and character (UTF-8).
Additional fields can be appended by clicking on the green + control next to the fields header line. Fields can be inserted by right-clicking either on the fields header or a field entry. This will cause a new field definition entry to be inserted immediately after the entry.
Additional headers can be added by either clicking on the green + control next to the header entry or by right-clicking on the header and selecting the 'Add Header' option. Headers can be removed by either clicking the red x control next to the header or by right-clicking on the header and selecting 'Remove Header.'
A header can be declared to either be 'fixed' or 'repeating.' A 'fixed' header appears only once at the start of a message. A 'repeating' header would appear before each record in a repeating collection of records.